First commands
Client
kubectl is the command line tool for interacting with Kubernetes clusters, it is the main CLI client for managing Kubernetes resources, and can be used to interact with Minikube, kind, k3s, and any other Kubernetes cluster.
It is just one client, but there can be others, CLI or GUI, that can interact with the Kubernetes API server.
Initial objects
Pod is the smallest object in Kubernetes, but we usually don't create pods directly, instead we use higher level objects like Deployment, an abstraction over pods, that manages the lifecycle of pods, and provides features like rolling updates, scaling, and self-healing.
Deployment is a blueprint for create Pods.
For create a deployment with kubectl, we can use the command:
kubectl create deployment <deployment-name> --image=<image-name>Creating a nginx deployment as example:
kubectl create deployment nginx-depl --image=nginxFor get the list of pods, we can use the command:
kubectl get podsAnd for list deployments, we can use the command:
kubectl get deployments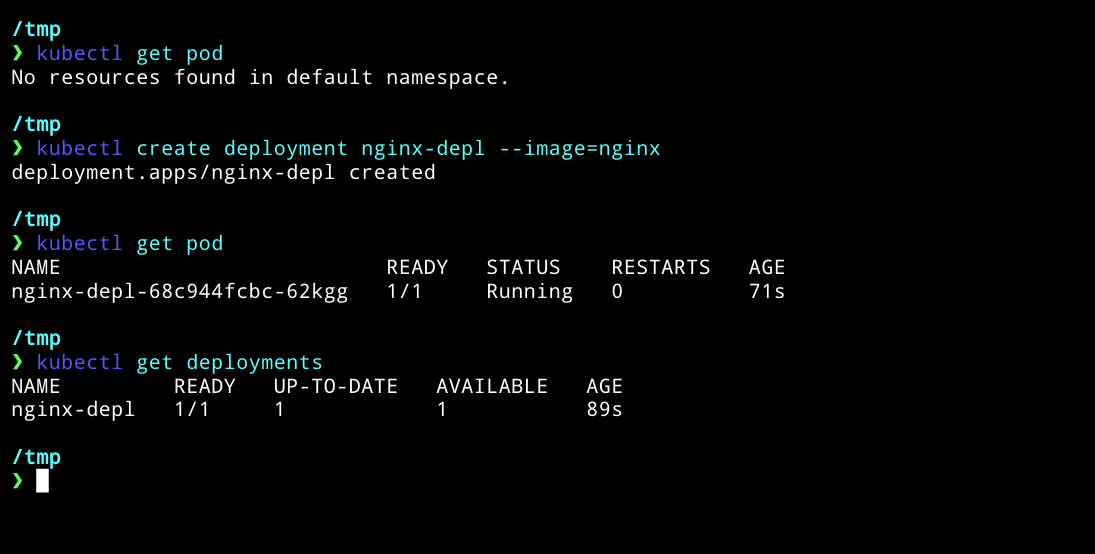
As you see in the pod name, it is a combination of the deployment name and a random string, that is generated by Kubernetes to ensure that each pod has a unique name.
nginx-depl-68c944fcbc-62kggnginx-depl: the name of the deployment68c944fcbc: a unique identifier for the ReplicaSet62kgg: a unique identifier for the pod
Between Deployment and Pod, there is another layer, called ReplicaSet, that is responsible for maintaining a stable set of replica pods running at any given time. It ensures that the desired number of pod replicas are running and available.
When we create a Deployment, Kubernetes automatically creates a ReplicaSet to manage the pods for that Deployment.
For list ReplicaSets, we can use the command:
kubectl get replicaset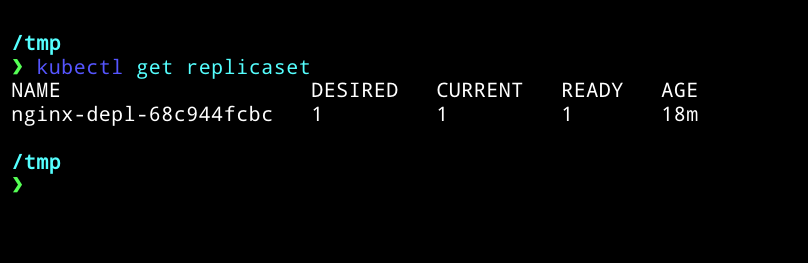
Repare that the ReplicaSet name is also a combination of the Deployment name and a unique identifier.
nginx-depl-68c944fcbc- Deployment manages a...
- ReplicaSet manages multiple...
- Pod is an abstraction of...
- Container is the actual running instance of an application.
Everything bellow Deployment is managed by Kubernetes, so we don't need to worry about it. We just need to interact with the Deployment.
For edit a deployment, we can use the command:
kubectl edit deployment <deployment-name>In our case
kubectl edit deployment nginx-deplThis will open the deployment configuration in the default text editor, where we can make changes to the deployment, like changing the image version, or the number of replicas. This configuration was automatically generated by Kubernetes when we created the deployment.
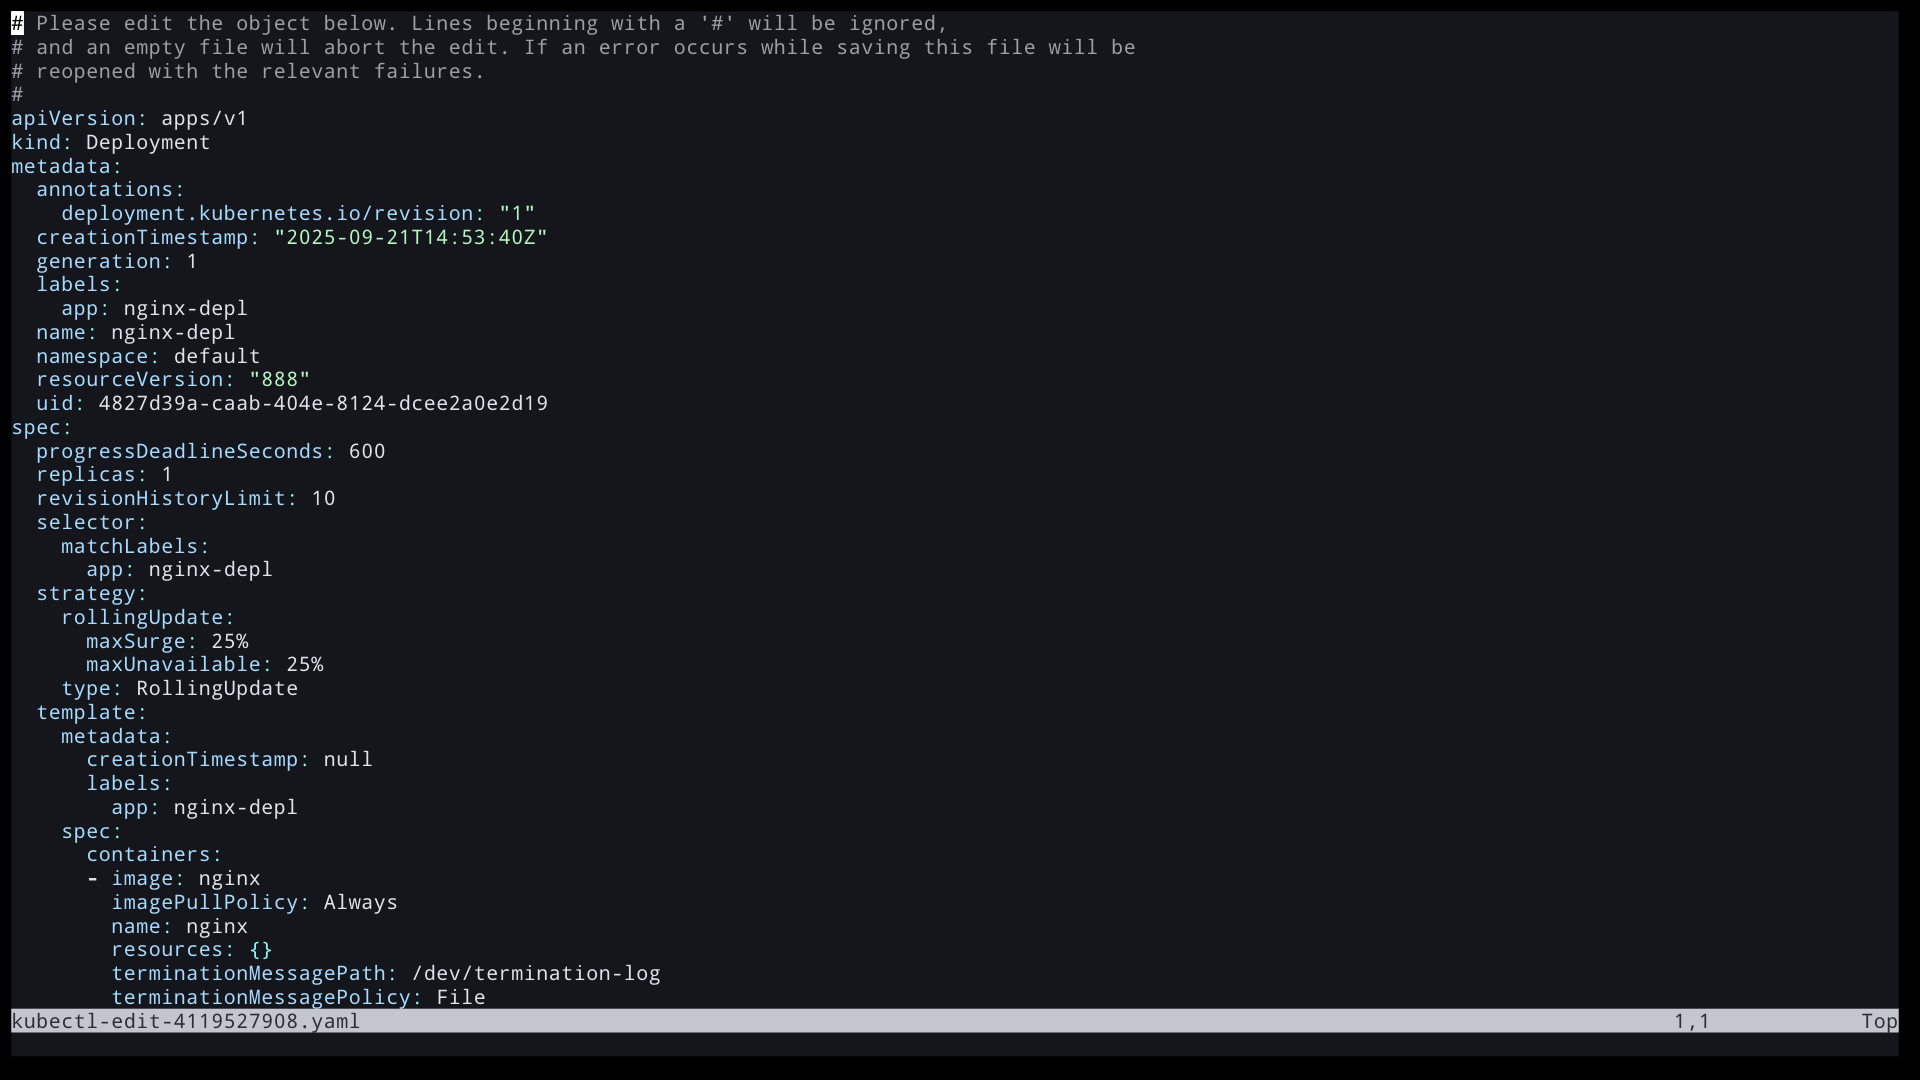
We can edit the spec section to change the number of replicas, or the image version.
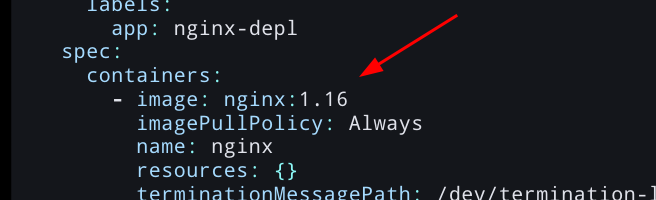
Here a changed the image version from nginx:latest to nginx:1.16, in yaml structure go down to spec.template.spec.containers[0].image .
After save and exit the editor, Kubernetes will automatically apply the changes to the deployment, and create a new ReplicaSet with the new configuration, and start rolling out the changes to the pods.
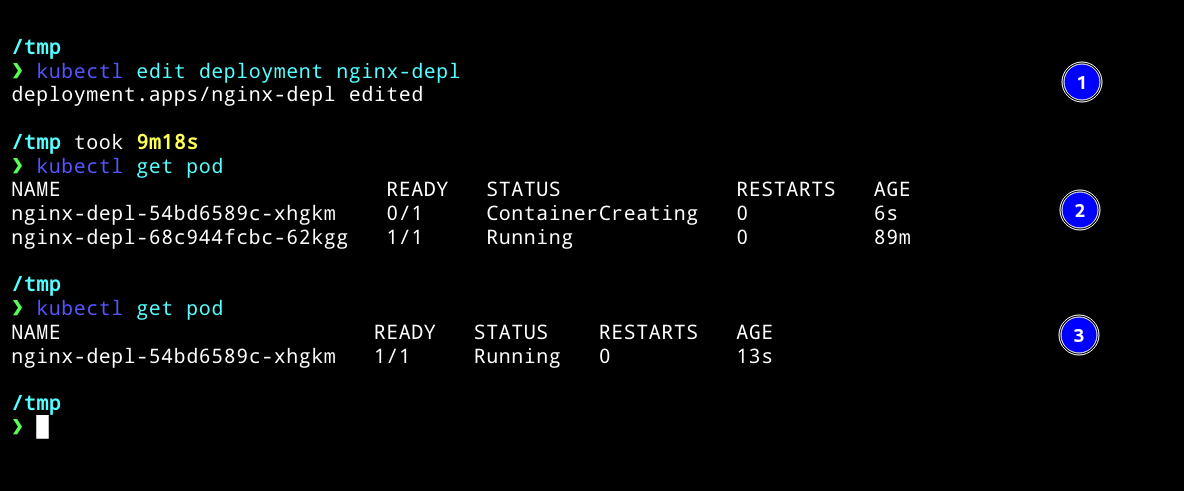
- The Kubernetes confirm that the deployment was updated successfully.
- A new Pod shows up with the new image version and start the rolling update process from the old pods to the new pods.
- The old pod are terminated as the new pods become ready.
If we run
kubectl get replicaset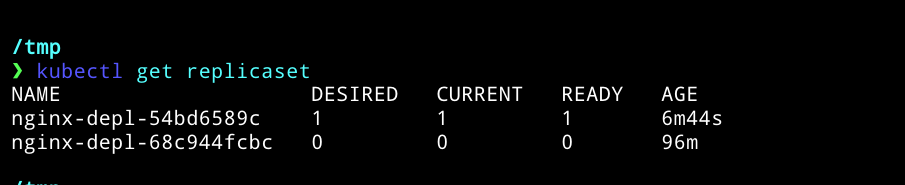
We can see that there are two ReplicaSets, one for the old version and one for the new version.
But just one of them is active, the other one is scaled down to zero replicas.
Debugging pods
We can see the logs of a pod with the command:
kubectl logs <pod-name>For example:
kubectl logs nginx-depl-54bd6589c-xhgkm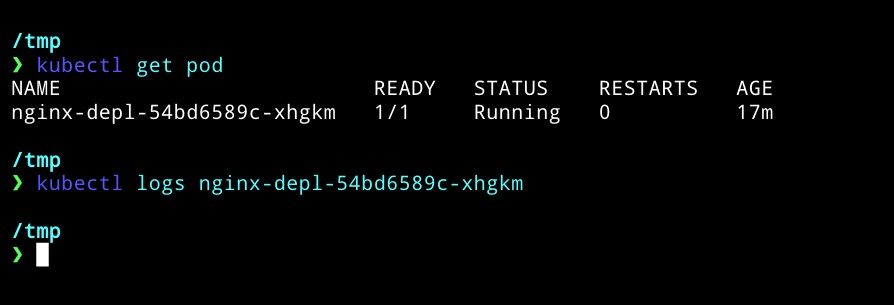
As we are using nginx, there is not many logs to see, but if we were to using a custom application, we would see the logs of that application.
Lets create a deployment for mongodb, a database that generates more logs.
kubectl create deployment mongo-depl --image=mongo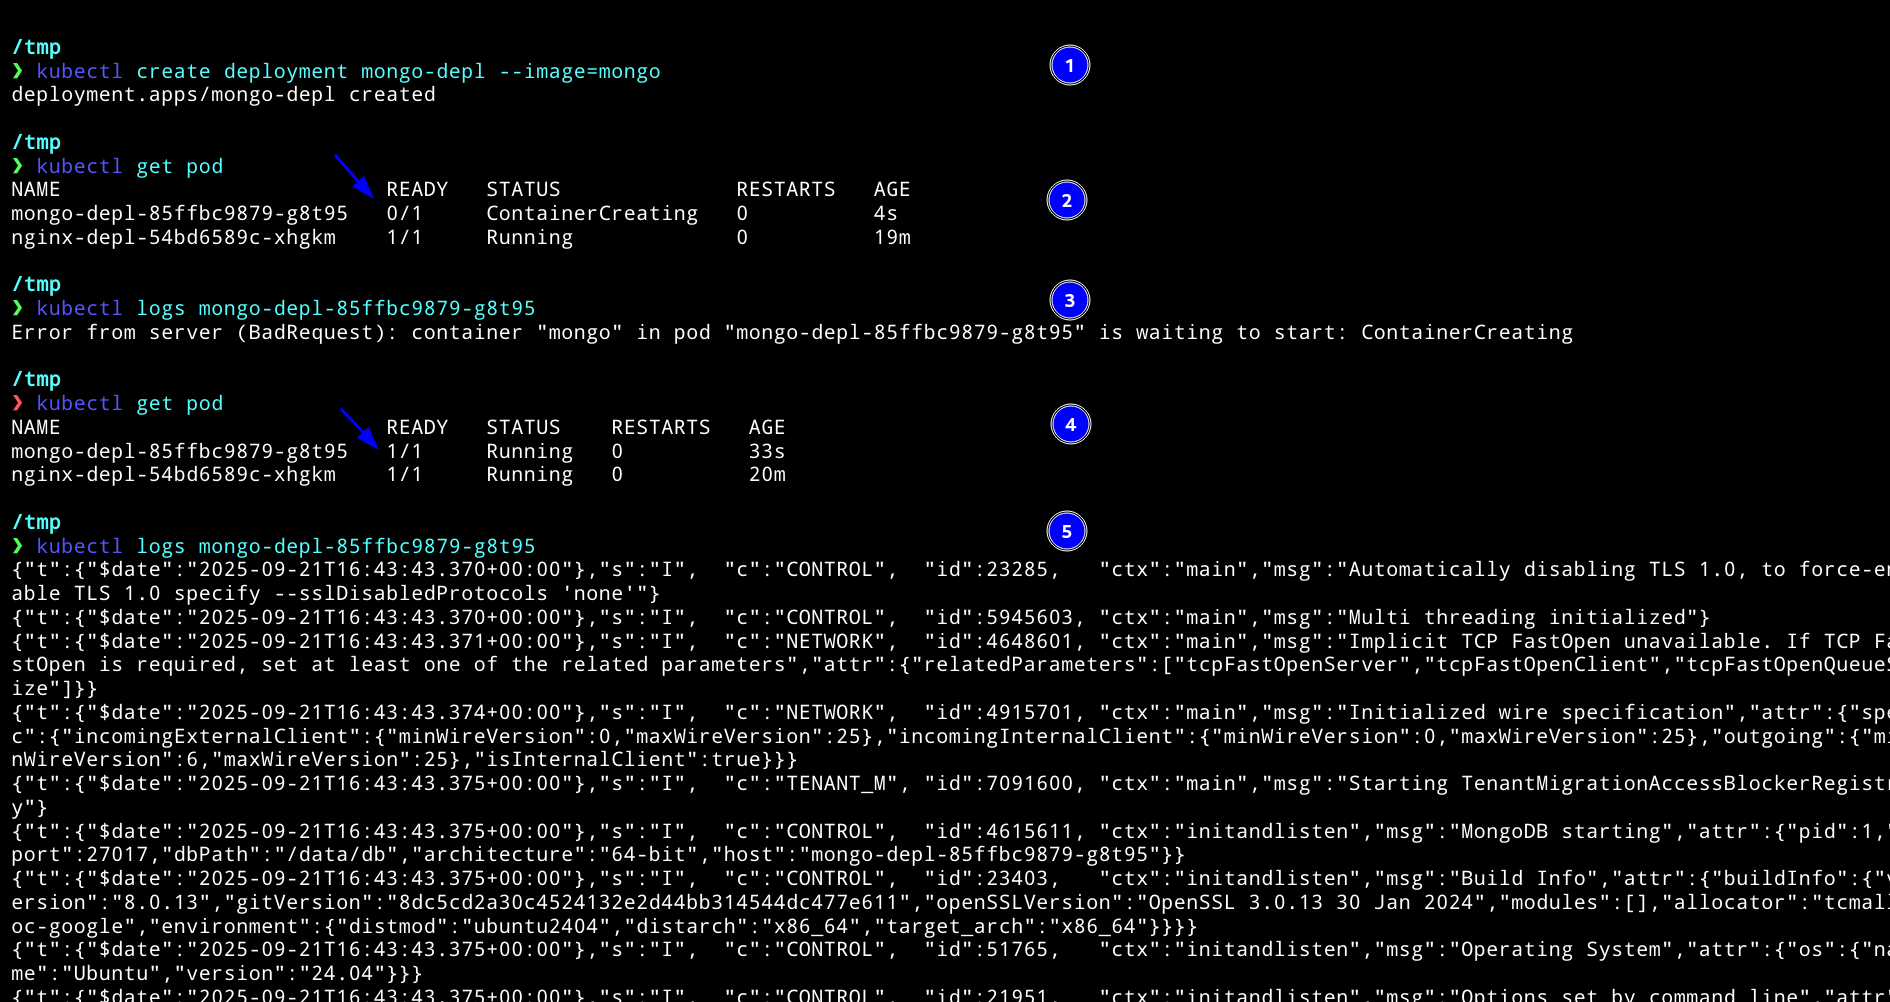
- Created the deployment
- Get the pods to see the name of the mongo pod, note that the pod is in
ContainerCreatingstatus, because the container is still being created. - Get the logs of the pod, the error is because the container is still being created, so there are no container to get logs from.
- Get the pods again, now the pod is in
Runningstatus. - Get the logs of the pod again, now we can see the logs of the mongo container.
We can also get details of a pod with the command:
kubectl describe pod <pod-name>For example:
kubectl describe pod mongo-depl-85ffbc9879-g8t95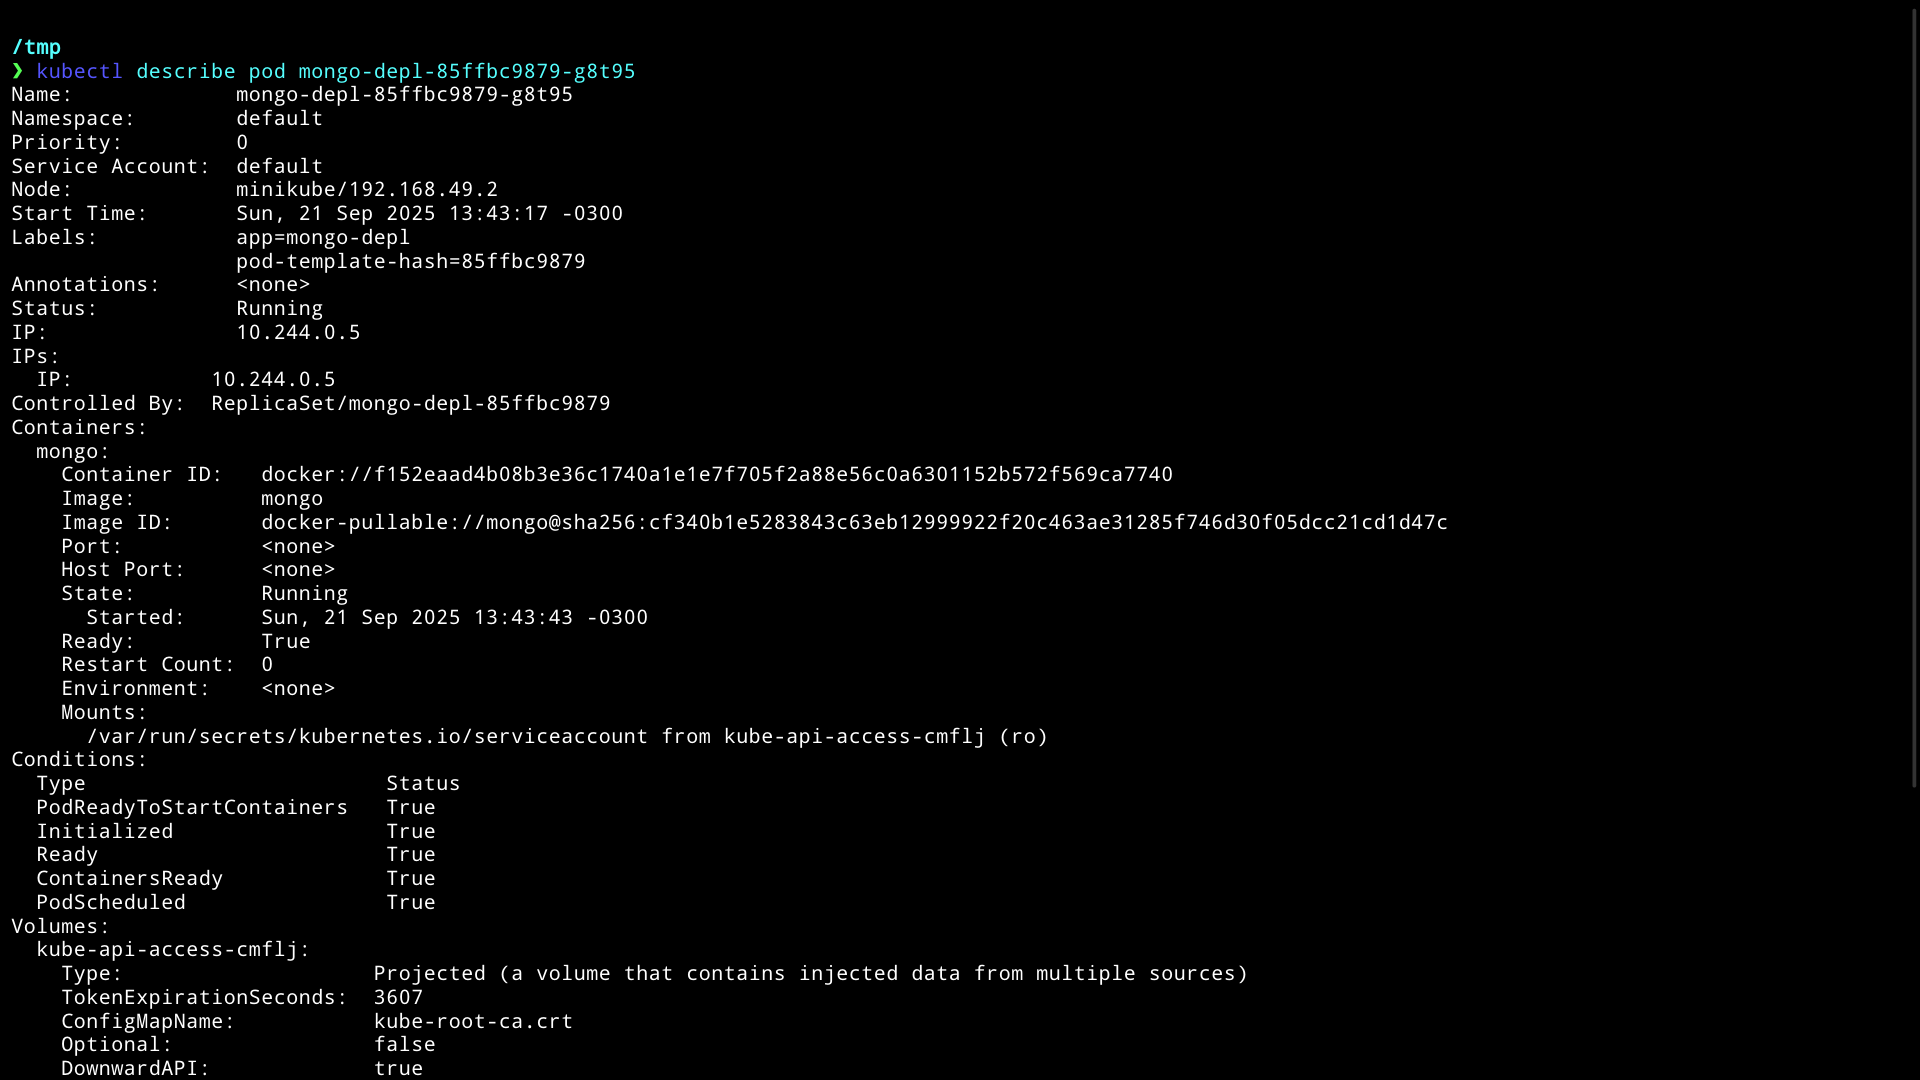
We can see a lot of information about the pod, like the events, the status, the containers, the volumes, and more.
If we go to the events section, we can see that the pod was scheduled to a node, the container image was pulled, and the container was started.

We can also execute commands inside a running container, like getting a shell inside the container, with the command:
kubectl exec -it <pod-name> -- <command>For example, to get a shell inside the mongo container:
kubectl exec -it mongo-depl-85ffbc9879-g8t95 -- /bin/bash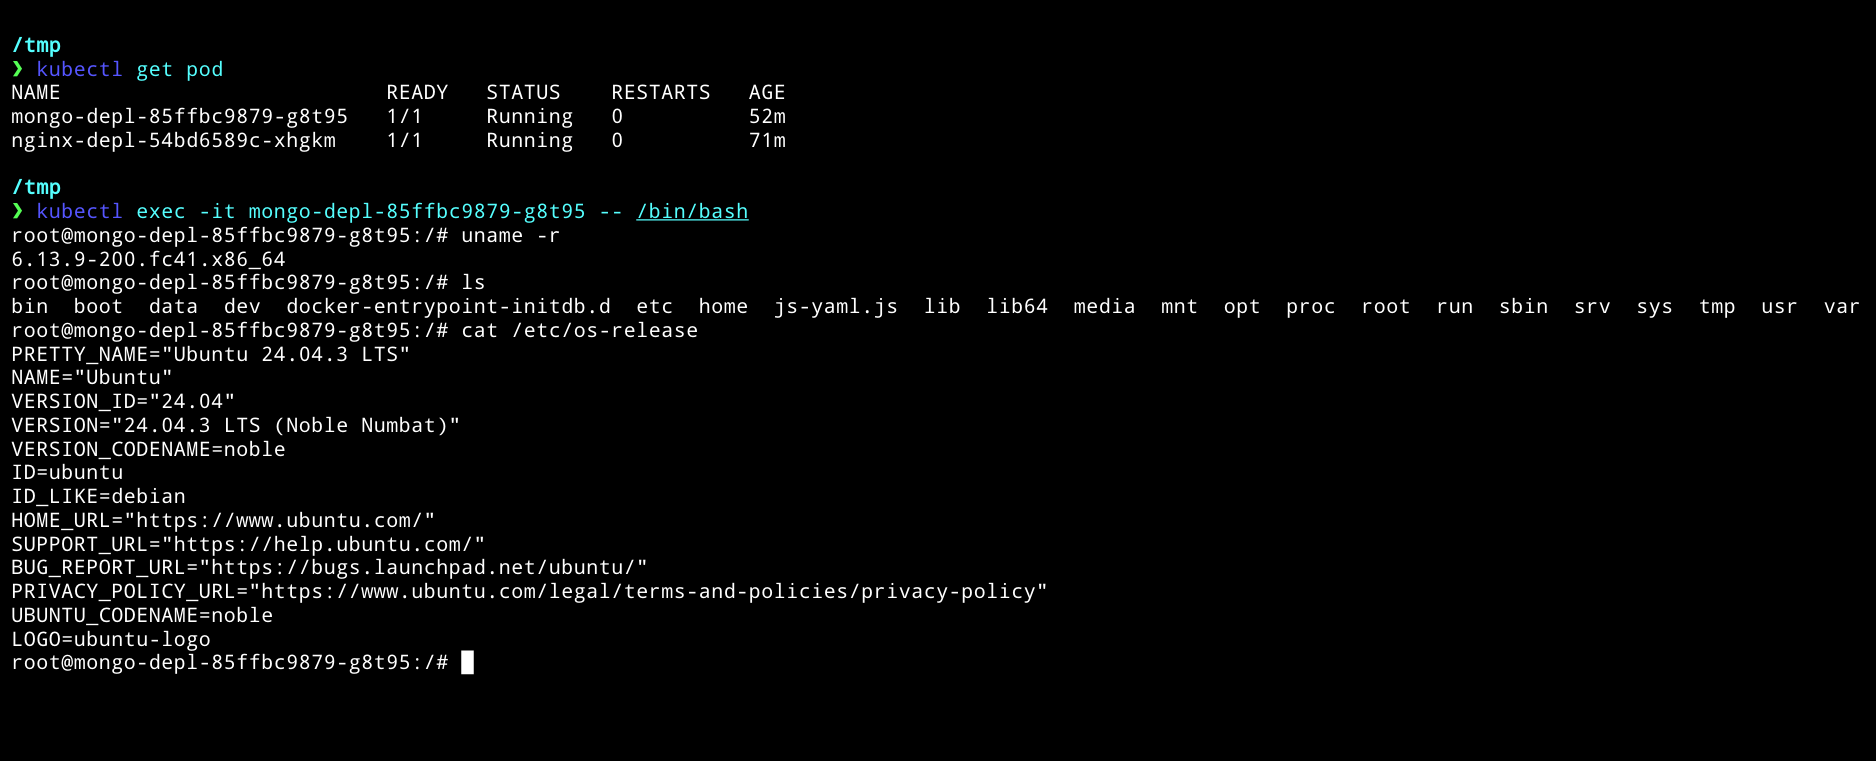
Delete objects
To delete a deployment, we can use the command:
kubectl delete deployment <deployment-name>For example:
kubectl delete deployment mongo-depl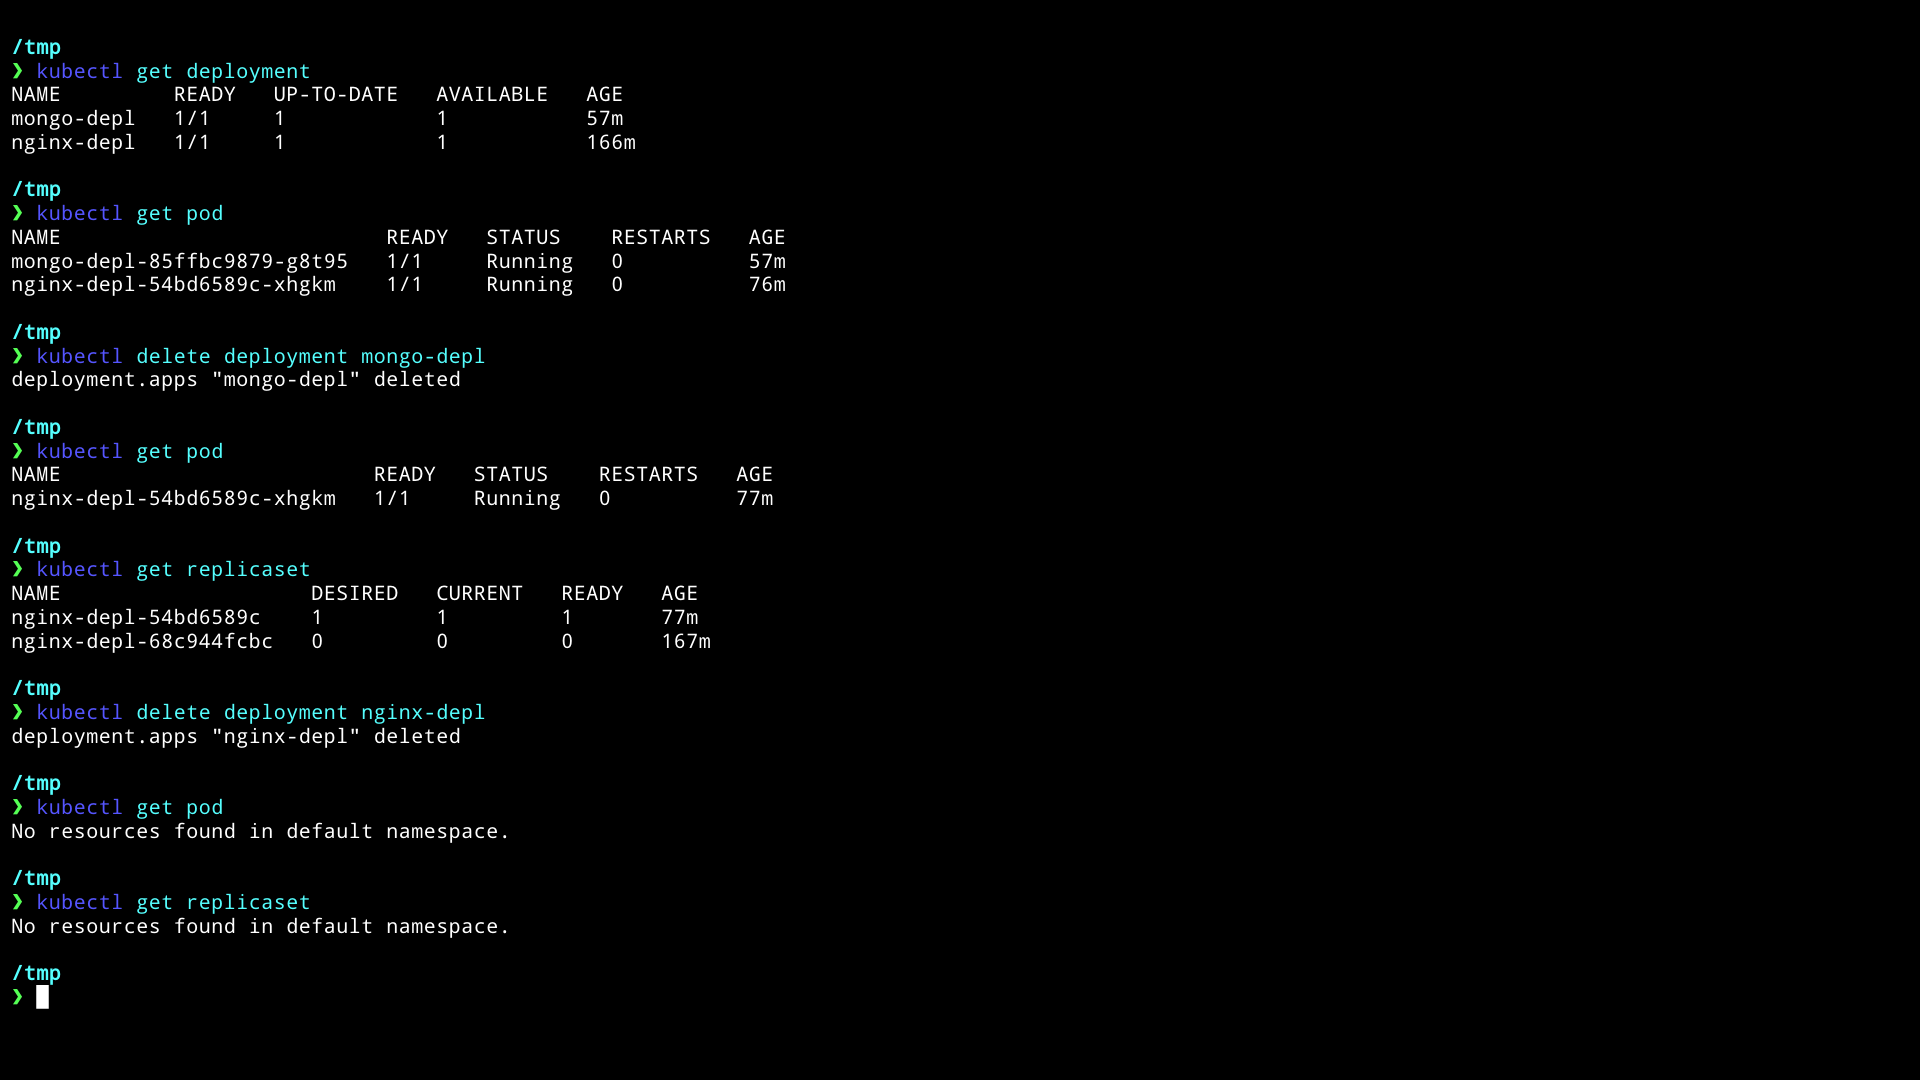
Configuration file
For create a deployment on CLI we usually use the command:
kubectl create deployment <deployment-name> --image=<image-name> <option1> <option2> ...This can be tedious, because we need to remember all the options and flags, and also we don't have a record of the configuration.
Instead, we can use a configuration file in YAML or JSON format, to define the deployment, and then apply the configuration on the cluster.
The way we can apply a configuration file is with the command:
kubectl apply -f <file-name>Let's create a file called nginx-deployment.yaml with the following content:
apiVersion: apps/v1
kind: Deployment
metadata:
  name: nginx-deployment
  labels:
    app: nginx
spec:
  selector:
    matchLabels:
      app: nginx
  template:
    metadata:
      labels:
        app: nginx
    spec:
      containers:
        - name: nginx
          image: nginx:1.16
          ports:
            - containerPort: 80
This is the basic structure of a deployment configuration file in YAML format.